 how-to
How to Implement Lockout Tagout Procedures Step by Step
Table of Contents
- What Is Lockout/Tagout and Why It Matters for Your Crew
- OSHA 29 CFR 1910.147 Requirements: What Employers Must Have in Place
- Step 1: Prepare Your Written Energy Control Procedure
- Step 2: Notify Affected Employees Before Shutdown
- Step 3: Shut Down, Isolate, and Lock Out Energy Sources
- Step 4: Verify Isolation and Test for Zero Energy State
- Authorized vs Affected Employees LOTO: Who Can Do What
- LOTO Training Checklist for Employees: Build a Safer Workforce
- Frequently Asked Questions
Last Updated: September 10, 2026
What Is Lockout/Tagout and Why It Matters for Your Crew
Lockout/tagout is a formal safety process that isolates hazardous energy before anyone services or repairs equipment, because unexpected startup and stored energy release remain among the most preventable causes of serious injury on job sites. This guide walks through implementing lockout tagout procedures step by step, from the written energy control procedure to the verification test that confirms a true zero energy state.
Most crews get this wrong: they treat lockout tagout procedures as paperwork rather than a physical sequence. The lock is not the point, the verification is.
Authorized employee means a worker trained to apply locks and tags and perform the isolation. Affected employee means anyone whose work brings them near the equipment but who does not service it. Confusing those two roles is a common compliance gap.
The stakes are straightforward. The OSHA lockout/tagout overview treats control of hazardous energy as a core workplace safety requirement, and the NIOSH machine safety research has documented that servicing and maintenance tasks carry outsized risk when energy is not isolated. Accident prevention starts with a real energy control procedure, not a laminated sign.
OSHA 29 CFR 1910.147 Requirements: What Employers Must Have in Place
The OSHA 29 CFR 1910.147 requirements are the baseline every employer must meet, and they are not optional for equipment that can injure someone during servicing. The standard, documented in the OSHA 29 CFR 1910.147 standard text, requires a written energy control procedure, employee training, periodic inspection, and proper lockout and tagout devices.
What must be in place before anyone touches a machine:
- A written, machine-specific energy control procedure
- Durable lockout devices and tagout devices, each assigned to a specific employee
- Training for authorized and affected employees, documented
- A periodic audit of the procedure, performed at least annually
- Clear safety signage and an energy source identification label on each machine
A common mistake is buying a wall-mounted lockout station and assuming the job is done. The station matters, but the written procedure is what an inspector asks for first.
Step 1: Prepare Your Written Energy Control Procedure
A written energy control procedure is a machine-specific document listing every energy source, its location, the method of isolation, and the steps to lock and verify it. Without it, your crew is improvising, and improvisation is where injuries happen.
Machine-Specific vs. Equipment-Specific Procedures
Use machine-specific procedures for equipment with multiple energy sources or complex control schemes; equipment-specific procedures work for simple, single-source machines where the isolation point is obvious and consistent. A machine with a disconnect switch, a pneumatic line, and a hydraulic accumulator needs a machine-specific procedure. No exceptions.
Step 2: Notify Affected Employees Before Shutdown
Notification of affected employees is a required step, not a courtesy. Before energy isolation begins, every affected employee who works near or operates the equipment must be told the machine is being shut down and locked out.
An affected employee who does not know the equipment is isolated may try to start it or troubleshoot a perceived fault, both create exposure. The notification should specify which machine, how long it will be down, and who owns the lock.
Step 3: Shut Down, Isolate, and Lock Out Energy Sources
Equipment shutdown follows the manufacturer's sequence, then energy isolation begins. Shut the machine down normally first, using its own controls, before touching any disconnect switch. An emergency stop is not a shutdown procedure and can leave the machine in a state the manufacturer never intended for servicing.

Identifying Every Energy Isolation Device Before You Lock
An energy isolation device is the specific point where you can sever a machine from its energy source. Before any lock goes on, walk the machine and tag every one:
- Electrical disconnects, the wall-mounted or machine-mounted switch feeding the panel. Confirm the disconnect actually de-energizes the circuit you think it does; mislabeled panels are common in older facilities.
- Motor control center (MCC) buckets, the individual starter buckets in a central panel. Each bucket needs its own lock, not just the panel door.
- Valves, gate, ball, or plug valves on pneumatic, hydraulic, steam, and process lines. A valve needs a lockable handle or a chain-and-lock arrangement over the wheel.
- Blind flanges and line blanks, physical barriers inserted into a pipe when a valve alone cannot be trusted to hold.
- Plugs and cord caps, on cord-and-plug equipment, unplugging and locking the plug in a lockout box is the isolation.
A common pattern is a machine with one obvious disconnect and two hidden isolation points, a pneumatic drop behind a panel and a hydraulic accumulator under the frame. The written procedure forces you to find them before the lock goes on, not after.
Applying Lockout Devices and Tagout Devices
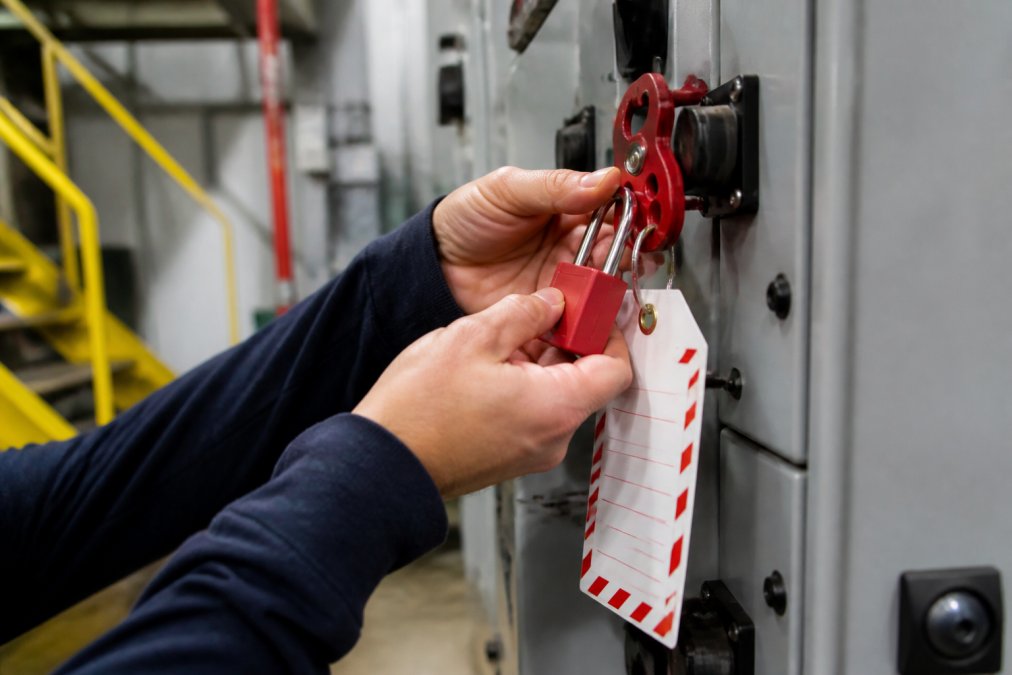
Each authorized employee applies their own lockout device and tagout device to the energy isolation device. A safety padlock with a unique key is the standard. A tag identifies the owner and the reason for the lock.
OSHA requires lockout and tagout devices to be durable, standardized by color or shape, substantial enough to prevent removal without excessive force, and identifiable to the individual who applied them. In practice:
- Locks, keyed-different safety padlocks, one key per lock, no master keys in circulation. A lock with a duplicate key defeats the entire system.
- Tags, write-on or pre-printed, with the employee's name, the date, and the reason. A tag without a name is decoration.
- Hasps, a multi-lock hasp lets several workers each apply their own lock to a single isolation point, so no one can re-energize until every lock is removed.
- Lockout boxes, for group work, keys go into a locked box and each worker applies their own lock to the box, controlling access to the keys themselves.
Tagout alone is permitted only when the energy isolation device cannot accept a lock. When tagout is used without a lock, the employer must demonstrate equivalent protection and train employees on the additional limitations. Most safety practitioners treat tagout-only as a temporary condition to be engineered out, not a permanent solution.
Releasing Stored and Residual Energy
Stored energy and residual energy are the silent hazards: capacitors hold a charge, springs stay compressed, hydraulic lines hold pressure, and elevated parts can fall. After isolation, release or restrain that energy before anyone reaches in.
Common release methods:
- Bleed hydraulic and pneumatic pressure at the designated valve, and confirm the gauge reads zero
- Ground capacitors to discharge them, then re-test before contact
- Block or lower raised components so they cannot drop, using rated blocking, not cribbing
- Allow hot surfaces to cool before contact
- Release tension on springs using the manufacturer's method
- Drain or vent steam and process lines, and account for thermal expansion in the line
A practical rule: after releasing stored energy, re-verify. A hydraulic line can hold pressure after the pump is off, and a capacitor can recover a partial charge. Release, then test, then proceed.
Step 4: Verify Isolation and Test for Zero Energy State
Verification turns "probably safe" into "confirmed safe." A verification test confirms the machine is at a zero energy state, no hazardous energy remains and the equipment cannot start.
How to verify, in order:
- Confirm the disconnect is open and locked
- Attempt a normal start at the control panel to confirm de-energization
- Return the control to the off position
- Test with a meter or test instrument at the point of work
- Confirm no stored energy remains
If the machine starts during step two, stop immediately, something is misidentified, and the procedure needs correction before work continues. Never proceed on an assumption.
Authorized vs Affected Employees LOTO: Who Can Do What
Authorized vs affected employees LOTO determines legal responsibility. An authorized employee performs the lockout, applies devices, and verifies isolation. An affected employee operates or works near the equipment but does not perform lockout, and must never remove a lock or tag.
| Role | Can Apply Locks | Can Verify Isolation | Can Remove Locks | Required Training |
|---|---|---|---|---|
| Authorized employee | Yes | Yes | Yes, only their own | Full LOTO training |
| Affected employee | No | No | No | Awareness training only |
Only the employee who applied a lock may remove it. If that person is unavailable, a documented removal procedure with management approval is required. Cutting a lock is a last resort, never a shortcut.
LOTO Training Checklist for Employees: Build a Safer Workforce
A LOTO training checklist for employees should cover recognition, procedure, and hands-on practice, repeated and documented. Training is not a one-time event.
- Identify all energy sources on assigned equipment
- Locate and read the machine-specific procedure
- Demonstrate correct lockout device and tagout device application
- Perform a stored energy release on a live training rig
- Complete a verification test with a meter
- Explain the difference between authorized and affected roles
- Walk through group lockout and shift change handoff
- Review the lock removal procedure for absent employees
On LOTO procedure audit frequency: OSHA requires a periodic inspection of the energy control procedure at least annually, covering each authorized employee. Many safety managers run audits more often, especially after a near miss. The audit is not a paperwork review, it should observe an actual lockout, confirm the procedure matches the machine, and correct any gap between the written document and what the crew actually does.
Group Lockout Procedures: When a Crew Shares One Machine
The harder case is a maintenance team of four to eight people working on one machine across a shift. Group lockout procedures keep every worker protected when the work is shared.
The mechanism: a primary authorized employee, the group coordinator, applies the initial lockout and verifies zero energy state. Each worker then applies their own personal lock to a group lockout hasp or lockout box at the isolation point. The equipment cannot be re-energized until every personal lock is removed, so no single worker can restore energy while another is still exposed.
A workable group lockout sequence:
- The coordinator shuts down, isolates, and locks the energy isolation devices.
- The coordinator verifies zero energy state and releases stored energy.
- Each worker applies their own lock and tag to the group hasp or box.
- The coordinator retains the key to the group box, or the box is locked so keys cannot be retrieved until all personal locks are off.
- As each worker finishes, they remove their own lock. The coordinator removes the last lock only after confirming all workers are clear.
The failure mode to design against: a coordinator who holds all the keys and removes the group lock while a worker is still inside the machine. The personal-lock requirement exists specifically to prevent that. If a worker's lock is on the hasp, the coordinator cannot re-energize, no matter what the schedule says.
Shift Change Protocols: Closing the Handoff Window
The riskiest moment in a multi-shift lockout is the handoff. The outgoing worker is tired, the incoming worker is not yet oriented, and the machine sits in a state that looks safe but is only safe because a lock is on it.
The protocol that works: the outgoing worker's lock stays on until the incoming worker has applied theirs, so there is no window where the equipment is unlocked. The handoff is verbal and documented, the outgoing worker walks the incoming worker through the isolation points, the stored energy released, and the work still in progress.
A shift change handoff should cover:
- Which energy isolation devices are locked, and by whom
- What stored energy was released and what remains restrained
- What work is complete and what is still open
- Any change to the procedure since the lockout began
- Confirmation that the incoming worker's lock is on before the outgoing lock comes off
Troubleshooting Failed Isolation
Sometimes the verification test fails, the meter reads voltage, the gauge holds pressure, or the machine tries to start. That is not a reason to proceed carefully. It is a reason to stop.
When isolation fails: stop work, re-secure the area, and re-trace the energy source. The usual causes are a misidentified isolation device, a second feed to the same panel, a backfeed from another machine on a shared circuit, or stored energy that was not fully released. None are fixed by re-testing and hoping. Correct the procedure before the lockout resumes, and document the correction so the next crew does not repeat it.
Group lockout and shift change protocols are where basic LOTO programs fail in practice. Personal locks on a group hasp, and a handoff with no unlocked window, are what turn a written procedure into a safe one.
Frequently Asked Questions
What are the 7 steps of a lockout/tagout procedure?
The seven steps are: prepare and plan the shutdown, notify affected employees, shut down the equipment, isolate all energy sources, apply lockout and tagout devices, release stored energy, and verify isolation before starting work. Each step must follow your written energy control procedure and OSHA standard 1910.147. Skipping verification is one of the most common violations.
What is the difference between a lockout device and a tagout device?
A lockout device physically holds an energy isolation device in the safe position using a safety padlock or multi-lock hasp. A tagout device is a warning tag that identifies the equipment and the authorized employee. Lockout is always preferred because it prevents re-energization. Tagout alone is allowed only when lockout is not possible, and it must provide equivalent protection per OSHA 1910.147.
Who is authorized to perform lockout/tagout procedures?
Only an authorized employee who has received specific LOTO training can perform lockout/tagout procedures. Affected employees must be notified but do not apply locks. Authorized employees must understand energy source identification, device application, verification, and re-energization. Retraining is required whenever job assignments change, equipment changes, or an audit reveals a gap in the energy control procedure.
How often should LOTO procedures be audited for compliance?
OSHA requires a periodic inspection at least annually for each energy control procedure. The audit must be performed by someone other than the authorized employee using the procedure and must cover all steps, including lockout device application and verification. Many safety teams conduct quarterly reviews for high-risk equipment. Document every audit and correct any deviations immediately.